If if you’re thinking of purchasing some gear, and would like to support me in helping photographers like you, consider using my B&H Photo Affiliate link.
Today’s question comes from Robert who says (edited for clarity):
First, thank you for creating such an engaging set of videos.
I am an amateur artist, and often need good reference photos. Would you help me get crisper images? Here’s the photo, and as you can see the foreground of the lace is significantly out of focus For the record, I typically use natural lighting for the photo, with only bounced flash to fill in if necessary.

Getting everything you want in focus in an image is a simple matter of depth of field, so let’s break this down. (If you want to watch the video version of this email, click here.)
There are three elements to insuring everything you want in focus is in focus. Those elements are Depth of field, Where you focus, and your lens.
First and foremost, you have to be aware of the depth of field for your image.
Depth of field is the distance between the nearest object in focus in an image, and the farthest object in focus.
For example, in the following image, the first and second army guys are in focus:

And if we look at this from above, we can see that the distance between them is two inches:
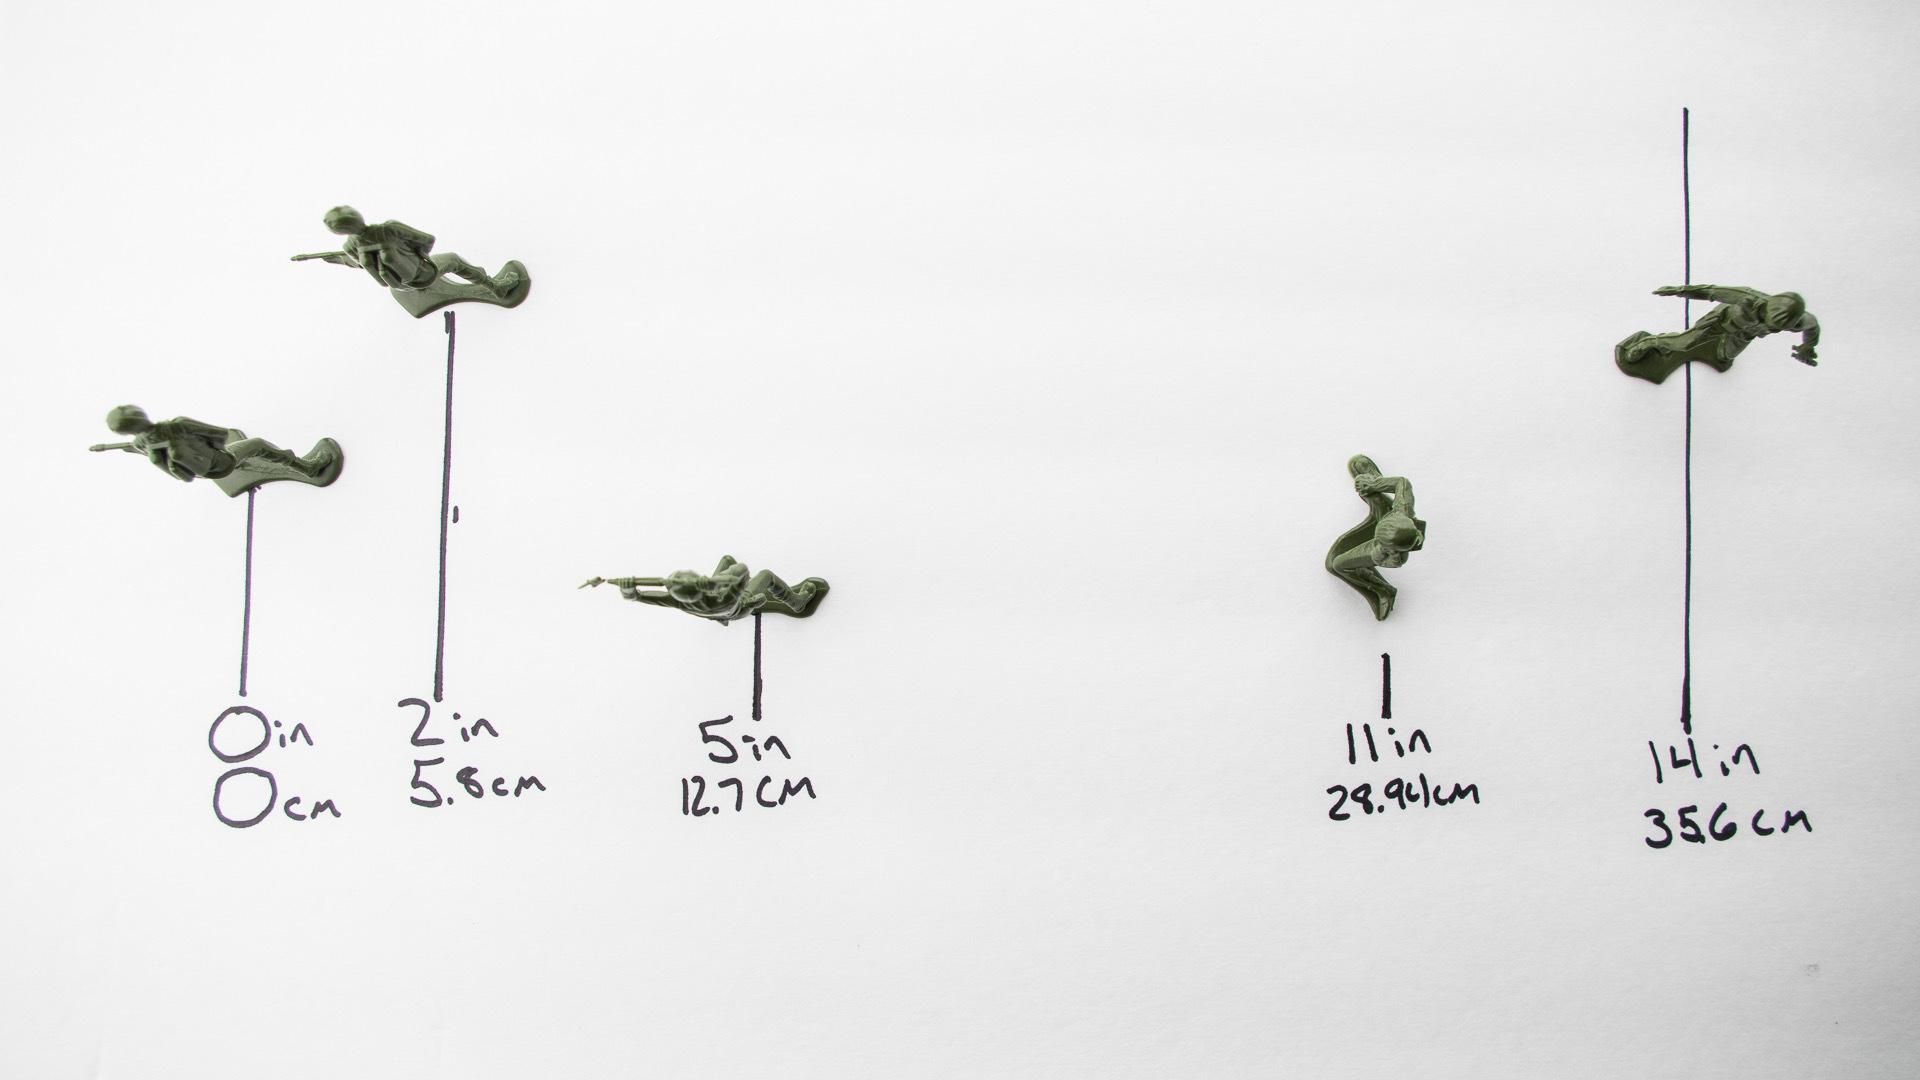
That tells us that the depth of field for this image is two inches.
When you’re taking a photo, be it of a still life reference scene, a group of people, a landscape; if you want everything in focus, you need to make sure your depth of field is great enough so that everything you want in focus fits inside that area.
Doing this is pretty easy. You just need to calculate your depth of field, and you don’t have to actually do any math, all you need is a depth of field calculator app (here’s one for iOS, and one for Android)
To use a depth of field calculator, you need to know four things.
The distance from the camera to the point of focus, the focal length of the lens, the aperture setting that will be used, and the distance between the nearest and farthest things you want in focus.
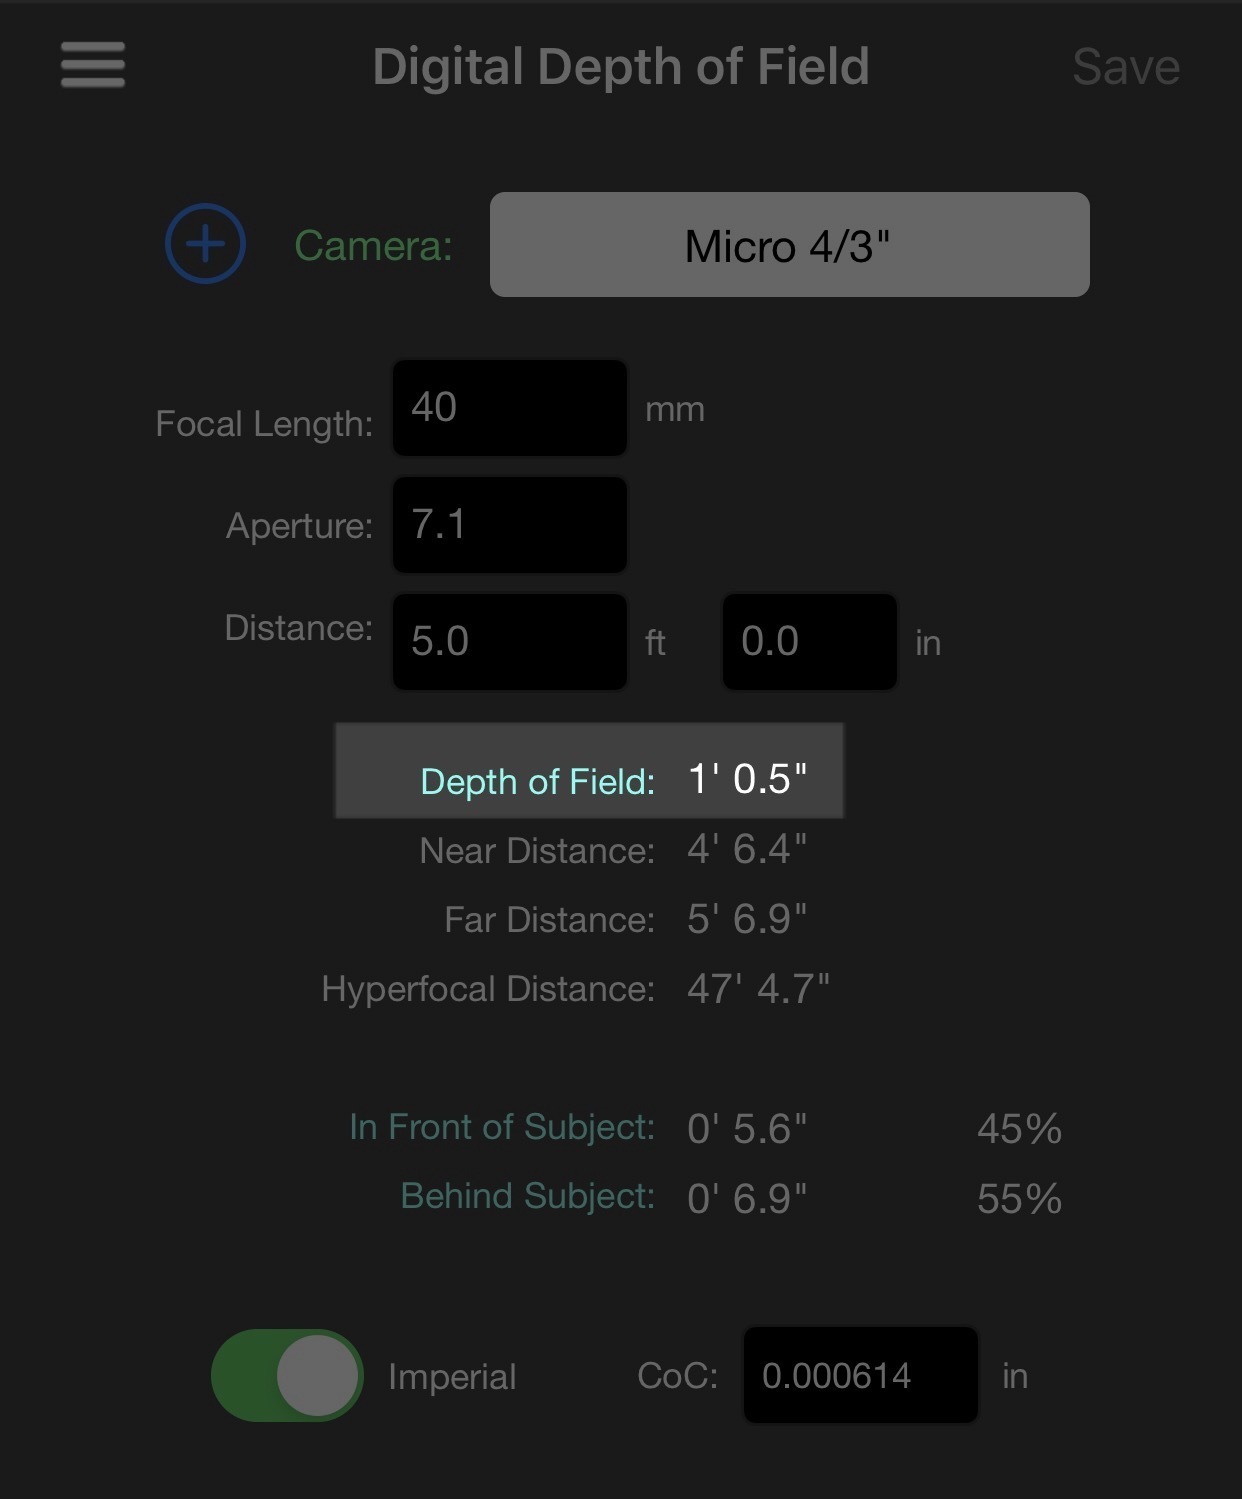
In the app, you input your aperture setting, focal length, and camera distance:

and it will tell you the depth of field:
If the depth of field given by the app is equal to or greater than the measurement you took, then you’re good.
If the depth of field given by the app is less than the measurement you took, then you need to make an adjustment.
The easiest setting to adjust is the aperture, which you can use to manipulate depth of field without having to change the composition of the image by moving the camera or changing the focal length.
If changing the aperture isn’t enough, you can move the camera farther away, and/or widen the focal length of the lens.
And what’s great about a depth of field calculator is that you can change those options in the app, figuring out what aperture, distance, and/or focal length you need, and then adjust the camera just once.
(remember when adjusting your aperture that you’ll also have to adjust your ISO and/or shutter speed to maintain your exposure)
Once you have the depth of field figured out, you need to figure out how to correctly focus.
One of the things people don’t often realize is how the depth of field area manifests.
Without thinking about it, people assume that the depth of field moves from the point of focus back into the image, but that’s not how it works.
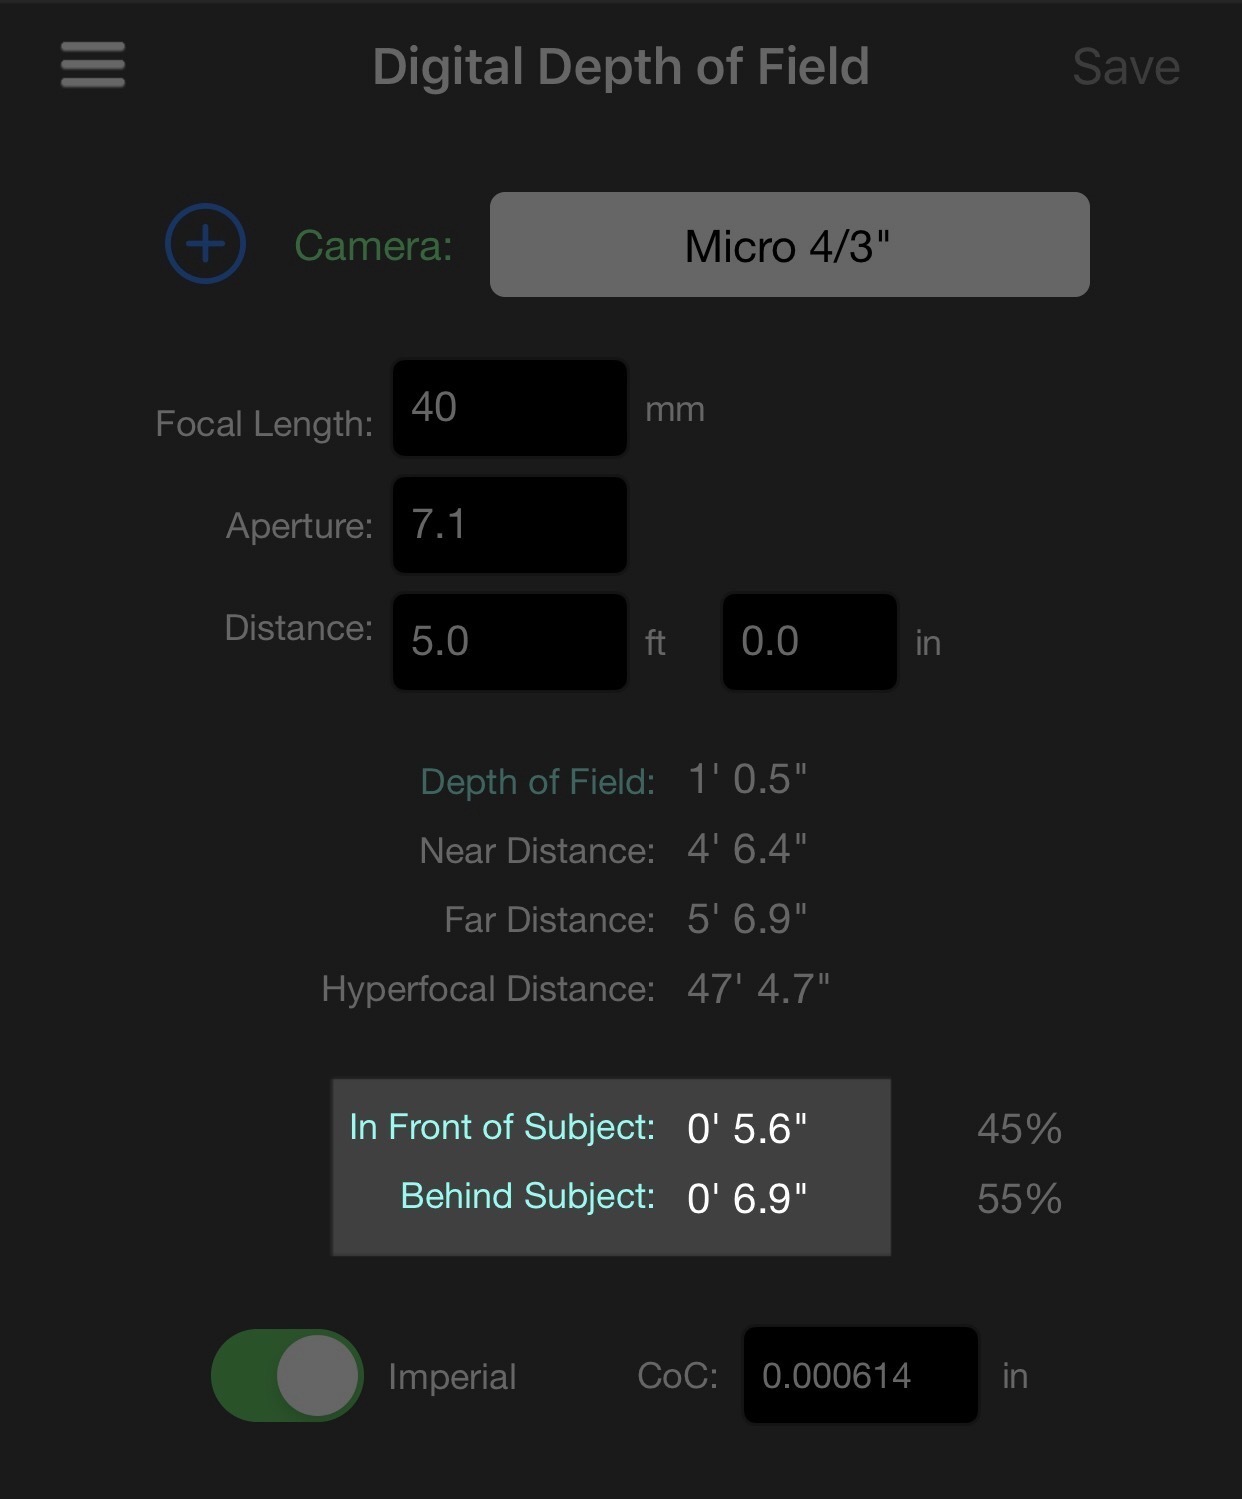
Instead, the depth of field area extends in front of and behind the focus point.
Because of this, you need to insure that when you focus, there’s enough depth of field behind the point of focus to have everything in focus.
This is where the depth of field calculator is really valuable, because part of what it shows you is how far in front of and behind the subject (point of focus) the depth of field area extends.
That brings us to our last element, which is the lens itself.
One of the problems lenses can have is a reduction in quality and sharpness of the image towards the edges of the lens.
In addition to that, at the edge of the lens, you can also pick up distortions that will make things look warped and stretched.
How much quality loss you’ll get varies wildly from lens to lens.
Generally speaking, cheaper lenses are more likely to have quality loss at the edges, while more expensive lenses are less likely.
And, generally speaking, zoom lenses are more likely to have quality loss at the edges, while prime lenses are less likely.
Because it varies so wildly, this is something you have to check and test with your own lenses. If you’re ever unsure of the edge quality of a lens, there’s an easy way to insure everything you want in focus is in focus.
What you do is to deliberately compose your image wider, leaving extra information at the edges of the photo.
By framing the shot wider, you can crop out any distortions or loss in sharpness from the lens, getting the best image quality and sharpness possible.
Getting everything you want in focus isn’t hard, you just need to know the depth of field you want and how to get it, where to focus so that everything is in the depth of field area, and to be aware of the edge quality of your lenses.
Disclosure: some of the links I use are affiliate links, meaning that at no additional cost to you, I will earn a commission if you click through and make a purchase.